Linux Terminal Beautify

Ever since I mistakenly refreshed my desktop to Ubuntu 24.04 system and left it idle for a long time, I now try to turn it into a productivity tool. The first thing needs to be done is to beautify the terminal just like the one in my Macbook Air. Here is how I did it: 💻
Table of Content
Shell Setup
ZSH
A powerful and user-friendly Unix shell that combines the features of both the Bourne shell (sh) and C shell (csh), while also adding many new and innovative features. It aims to be a highly functional and interactive shell. Some key features of ZSH include: Command Line Completion, Spelling Correction, History Management, Plugin Architecture, and Theme Support. Since I use ubuntu environment, I prefer using apt to install zsh.
sudo apt install zsh
If you meet some problems in setting
zshas default shell, you can usechsh -s /bin/zshto set. I think if you finish setting upOh My ZSHsuccessfully, you actually already makezshas your default shell. Check it withecho $SHELL. But if still meet problems, just restart your Ubuntu Desktop.
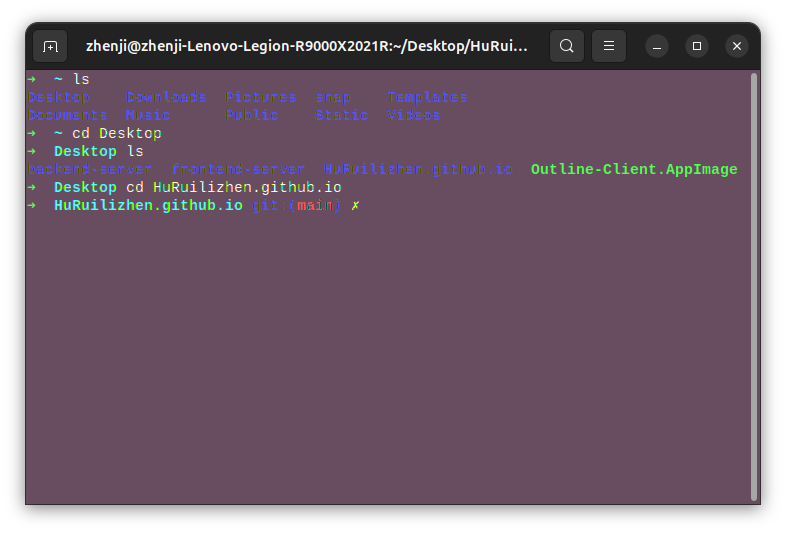
Oh My ZSH
This third-party plugin manager is a collection of plugins for ZSH that I use. It provides a bunch of useful features and plugins. Here is how I installed it:
sh -c “$(curl -fsSL https://raw.githubusercontent.com/ohmyzsh/ohmyzsh/master/tools/install.sh)”
And here is a screenshot of what we have done:
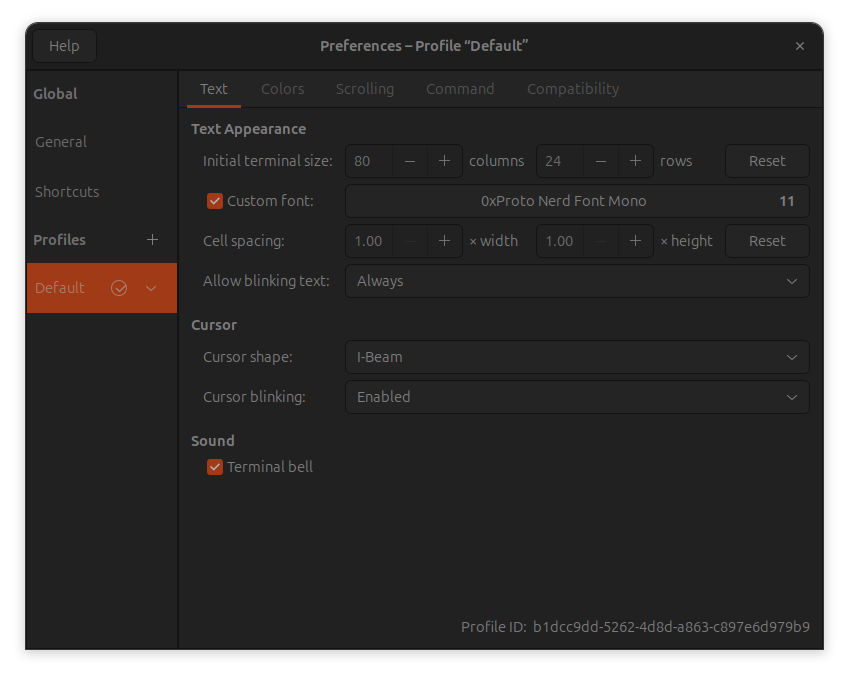
Nerd Font
With Nerd Font you can get a beautiful terminal with awesome icons. If you don’t have Nerd Font installed, you can choose one here
If you have Nerd Font installed, you can set it in Terminal>Preferences>Profile>Custom Fonts like below:
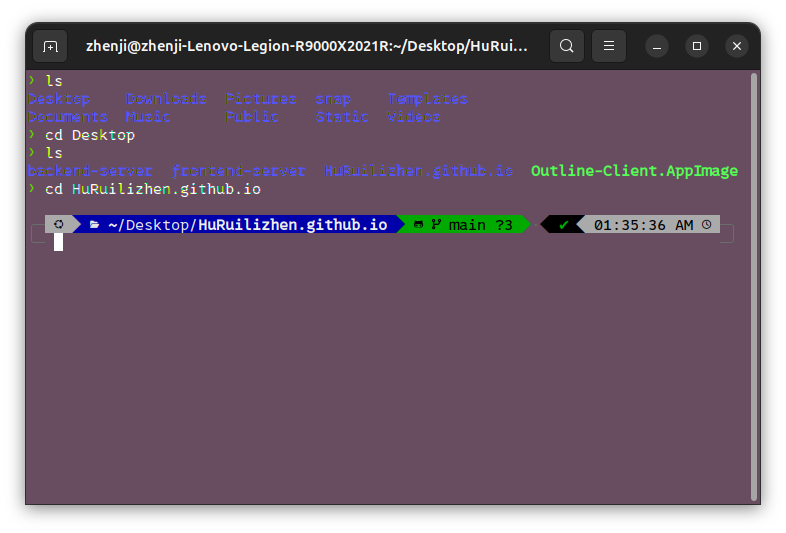
Powerlevel10k
Apowerfull theme I use for my terminal. It is a good choice for a good productivity. You can find it at Powerlevel10k GitHub repo. Using git to clone it is easy:
git clone --depth=1 https://github.com/romkatv/powerlevel10k.git ${ZSH_CUSTOM:-$HOME/.oh-my-zsh/custom}/themes/powerlevel10k
- Then set
ZSH_THEME="powerlevel10k/powerlevel10k"in~/.zshrc - Restart your terminal or type
source ~/.zshrc - Set the same terminal font in VSCode
"terminal.integrated.fontFamily": "'0xProto Nerd Font'"(optional) - Reset powerlevel10k theme configuration by command
p10k configure
With a screenshot, you can see terminal with Powerlevel10k theme:
zsh-autosuggestions
A plugin that suggests commands based on what you have typed.
git clone https://github.com/zsh-users/zsh-autosuggestions ${ZSH_CUSTOM:-~/.oh-my-zsh/custom}/plugins/zsh-autosuggestions
- Then set
plugins=(... zsh-autosuggestions)in~/.zshrc - Restart your terminal or type
source ~/.zshrc
zsh-syntax-highlighting
A plugin that highlights your command syntax. It is a must-have plugin.
git clone https://github.com/zsh-users/zsh-syntax-highlighting.git ${ZSH_CUSTOM:-~/.oh-my-zsh/custom}/plugins/zsh-syntax-highlighting
- Set
plugins=(... zsh-syntax-highlighting)in~/.zshrc - Restart your terminal or type
source ~/.zshrc
Command Line Tool Setup
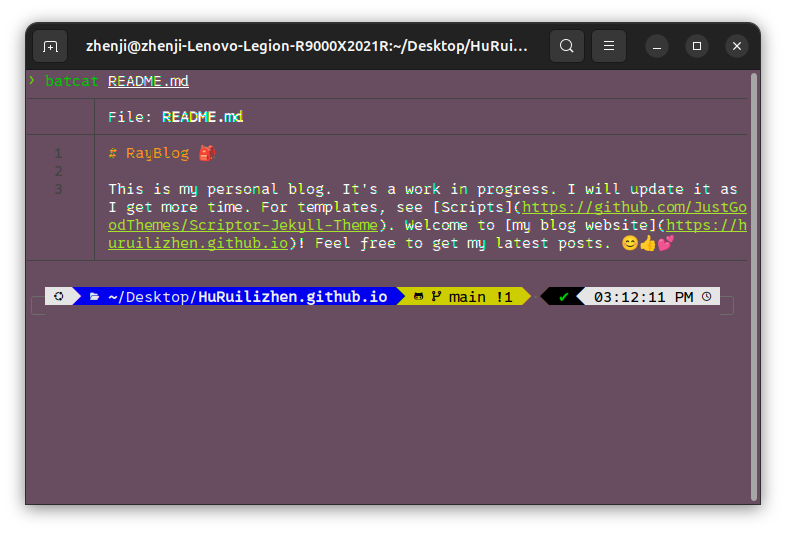
bat
Which is short for better cat. Basically, it is a cat with syntax highlighting, line numbers, and pages.
sudo apt install bat
Here is a screenshot of using bat to show README.md file:
fzf
A command-line fuzzy finder that helps you select files and commands. I don’t recommend using apt to install fzf, since you must do key-binding for it manually. Therefore, git clone it from GitHub.
git clone –depth 1 https://github.com/junegunn/fzf.git ~/.fzf
- Then install
fzfusing~/.fzf/install - Restart your terminal or type
source ~/.zshrc
| Key Bindings | Actions |
|---|---|
<C-t> |
Find files |
<C-r> |
Find commands |
<command> <file path>/** |
Combine fzf with other commands |
- Additionally, if you want to make
fzfwork witheditor, you can add following lines in~/.zshrc:
function open-editor-with-fzf() {
    local file=$(find . -type f | fzf --preview="cat {}")
    if [[ -n $file ]]; then
        ${EDITOR:-nvim} "$file"
    fi
}
zle -N open-editor-with-fzf
bindkey "^E" open-editor-with-fzf
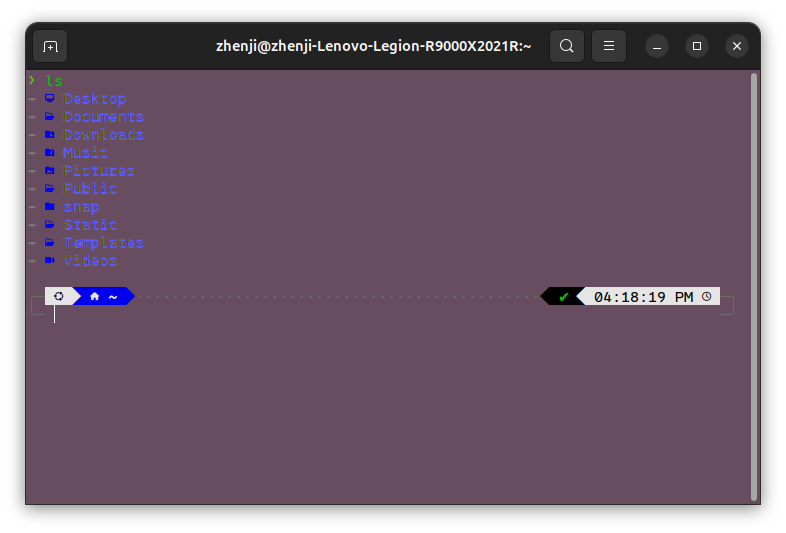
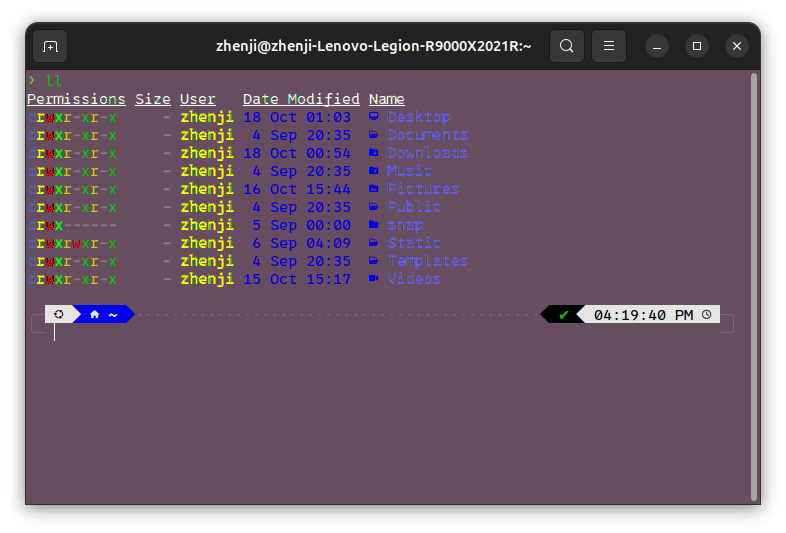
eza
Better ls command with colors and icons. Make your terminal look more interesting.
sudo apt install eza
And setting alias ls to eza in ~/.zshrc
# --- eza ---
alias ls="eza --color=always --long --git --icons=always --no-time --no-user --no-permissions"
alias ll="eza --color=always --long --git --icons=always --header"
Then restart your terminal or type source ~/.zshrc, and try ls and ll.
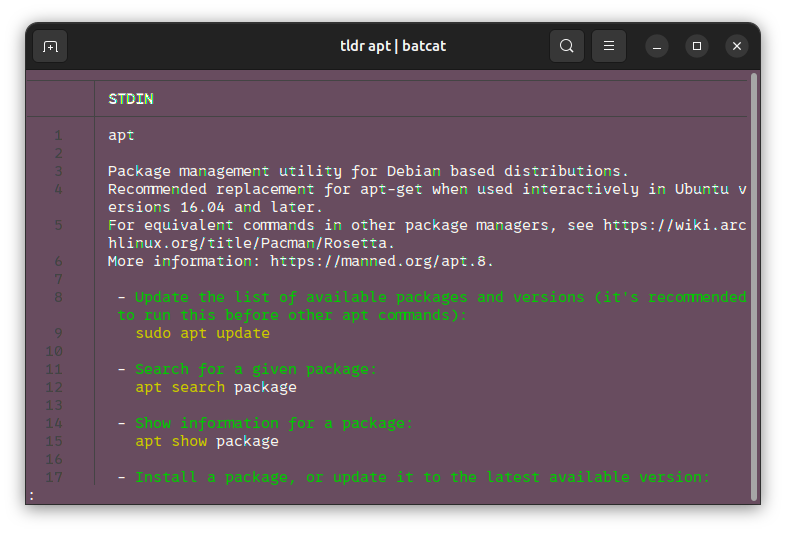
tldr
A command-line man page reader but more user-friendly.
sudo apt install tldr
See different commands with tldr using tldr <command>, here is an example comparing tldr and man:

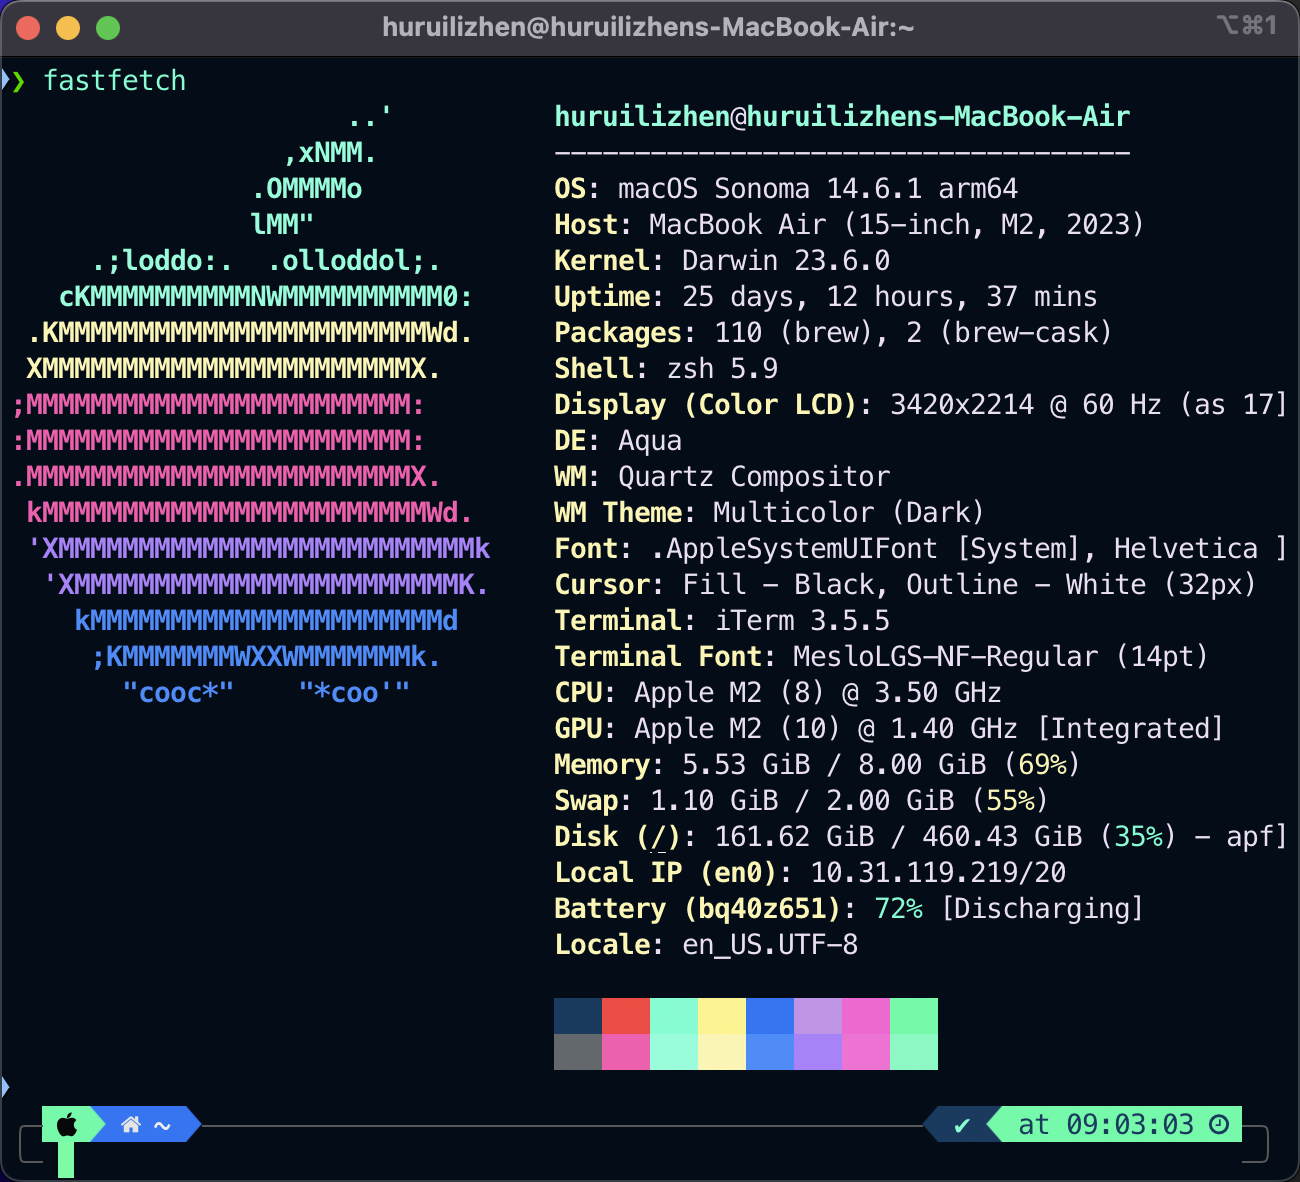
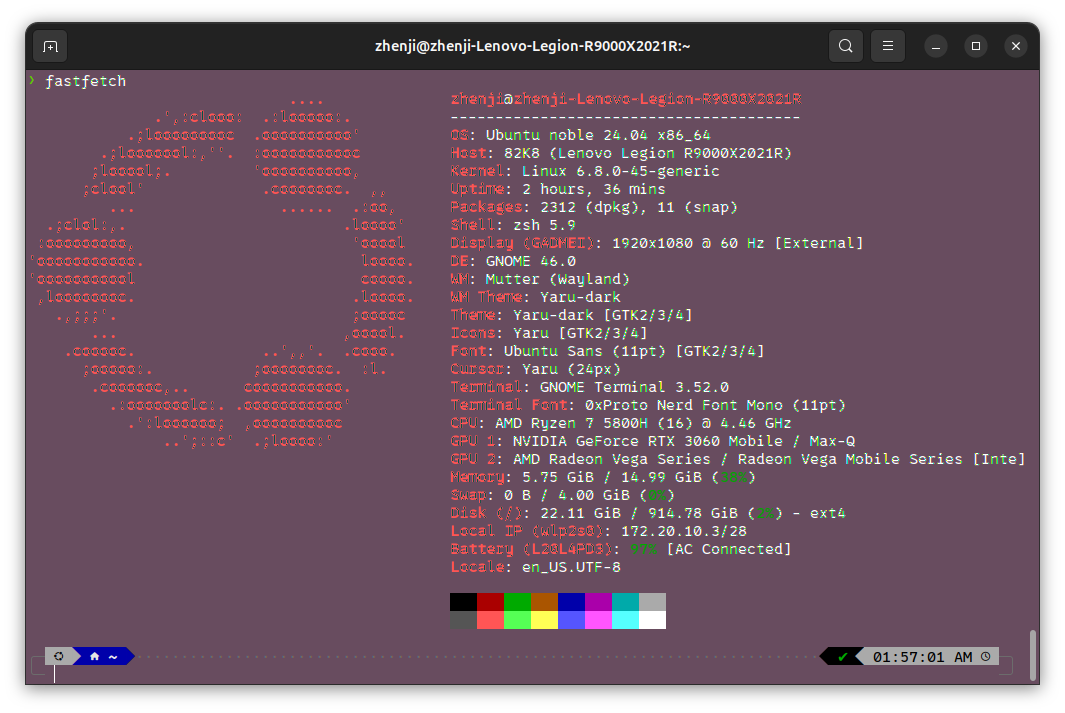
fastfetch
A command-line system information tool that is easy to use and fast. The install process is a bit different from others. We need to add ppa:zhangsongcui3371/fastfetch to our sources, and then install it.
sudo add-apt-repository ppa:zhangsongcui3371/fastfetch
sudo apt update
sudo apt install fastfetch
By the way, we can directly install fastfetch by typing brew install fastfetch in MacOS. Here are some screenshots of using fastfetch to show system information (Apple Silicon and Linux):
Editor Setup
Neovim
AstroNvim is an aesthetically pleasing and feature-rich neovim config that is extensible and easy to use with a great set of plugins. To install it, you need to install neovim first.
sudo apt install neovim
- Then clean up cache and state files:
mv ~/.local/share/nvim ~/.local/share/nvim.bak
mv ~/.local/state/nvim ~/.local/state/nvim.bak
mv ~/.cache/nvim ~/.cache/nvim.bak
- Clone AstroNvim repository
git clone --depth 1 https://github.com/AstroNvim/template ~/.config/nvim
# remove template's git connection to set up your own later
rm -rf ~/.config/nvim/.git
nvim
Integrate with AI Tools
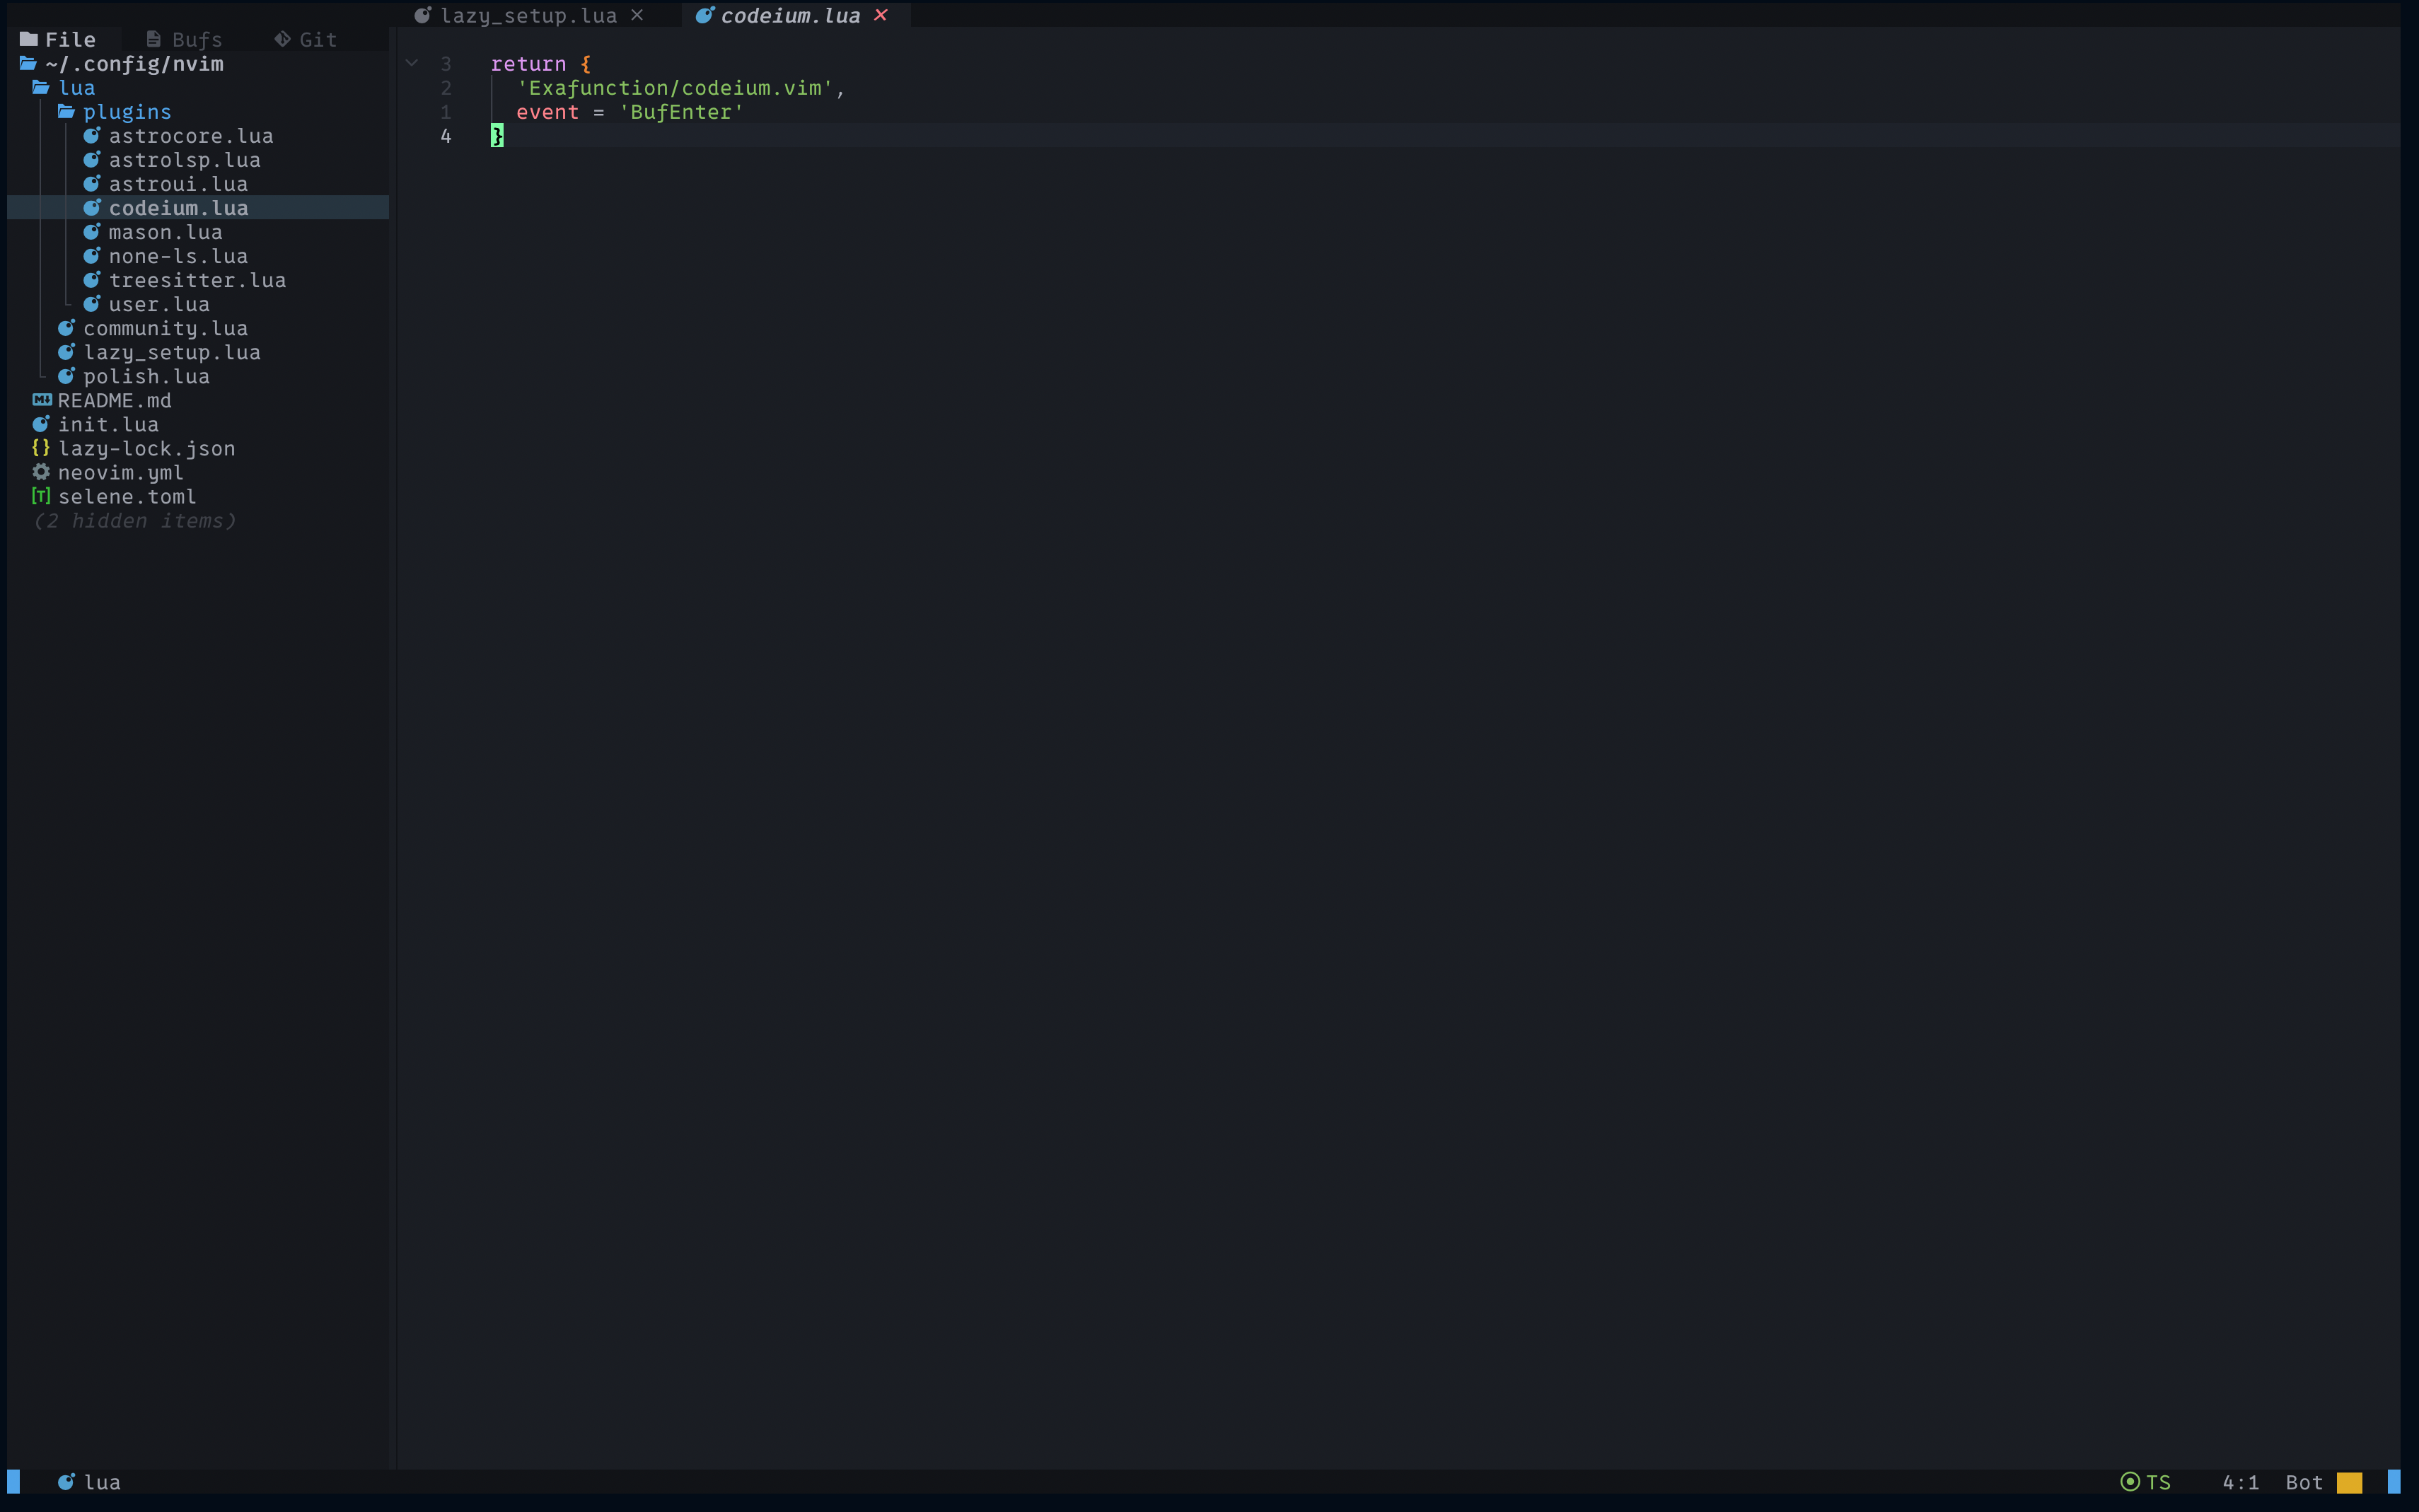
Codeium is a powerful code assistant that provides an AI-powered code completion, code refactoring, and code formatting. I usually use it in my daily work before with VSCode. Let’s do it in Neovim, add a new file named codeium.lua in ~/.config/nvim/lua/plugins/ and add the following lines:
return {
  'Exafunction/codeium.vim',
  event = 'BufEnter'
}
- Then install the plugin, by typing
SPC + p + iinNeovim(normalmode) - Before you start using codeium you need to auth your account type
:Codeium AuthinNeovim(commandmode) - Look for more help info you can use
:help codeium. Here list some useful commands:
| Action | Function | Default Binding |
|---|---|---|
| Clear current suggestion | codeium#Clear() |
<C-]> |
| Next suggestion | codeium#CycleCompletions(1) |
<M-]> |
| Previous suggestion | codeium#CycleCompletions(-1) |
<M-[> |
| Insert suggestion | codeium#Accept() |
<Tab> |
| Manually trigger suggestion | codeium#Complete() |
<M-Bslash> |
| Accept word from suggestion | codeium#AcceptNextWord() |
<C-k> |
| Accept line from suggestion | codeium#AcceptNextLine() |
<C-l> |
- You can also use
:Codeium Enableand:Codeium Disableto turn on/off the plugin. - More info see: Codeium GitHub Repository
Reference:
📑 Geeksforgeeks - How to make Linux terminal look awesome
📑 Josean - 7 Amazing Cli Tools
📑 Launchpad - Fastfetch Setup in Ubuntu
Comments